Making a Unique Keyboard
One day, my daughter started telling us stories about a race of triangular beings. The fact that these stories started a short time after she discovered the videos of Vi Hart (link) is, I'm sure, completely coincidental.
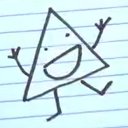
According to my daughter, the Triangles have their own world, their own history, and their own alphabet. Conveniently, their alphabet has 26 letters that correspond to the Roman alphabet. Upon my request, she wrote out the full alphabet for me to learn, which was useful for reading the speech balloons in her doodles of Triangles.
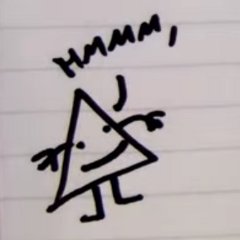
One day, I was looking at a speech balloon that said "YAY!" and it struck me that the Triangles even had their own exclamation point. Curious, I asked her about the Triangle period, comma, and so forth, and to my surprise she readily produced (on a page in my notebook) every single punctuation mark I could think to ask about. Question mark, percent sign, asterisk, curly braces … the Triangles even had their own symbol for our dollar sign and cent sign. The Triangles used the same numerical digits as we did, but everything else was different.
(And these symbols weren't just being tossed off on a whim, either. At one point I went back through some of her old doodles made during math homework, and realized that she had shown me the Triangle plus sign and equal sign several months ago. They were the same as the ones she had drawn recently.)
Looking at this page of symbols, I got it in my head that it would be fun to draw up an ASCII chart for her, but written entirely in the Triangle's alphabet. I seriously considered making this for her as a Christmas present, when an even better idea occurred to me.
An actual keyboard, entirely in Triangle.
At first, I figured this wouldn't actually be too hard to do. All I needed was a keyboard with blank keycaps, and some way to draw symbols on them. And it is exactly this sort of blind naïveté that marks the initiation of many of my most successful projects, because if I had understood at the outset how much work this would actually entail, I almost certainly would have been too intimidated to proceed.
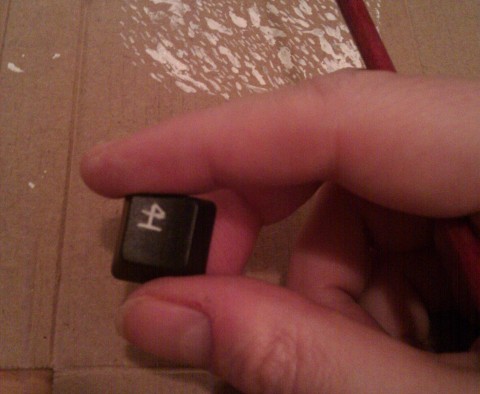
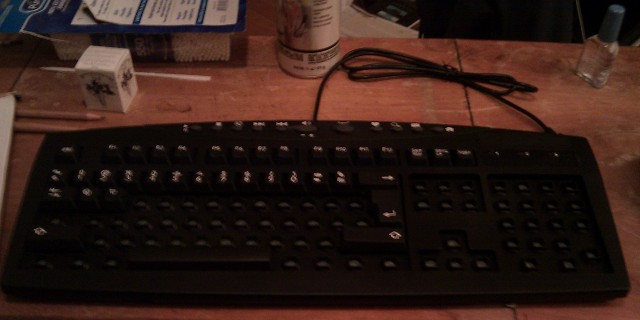
The first order of business was to procure the blank keyboard, and fortunately for me such things do already exist. The DAS keyboard (amazon link) is a well-known though expensive instance of one. I did a little poking around a found a more reasonably-priced example from a company called Ablenet (amazon link).
It comes with large-font stickers that you can apply to the keys. Or not, as the case may be.
After plugging it into my computer and verifying that that all the keys were where I thought they were, I drew up a chart showing the full layout of all 104 keys, and their Triangle legends.
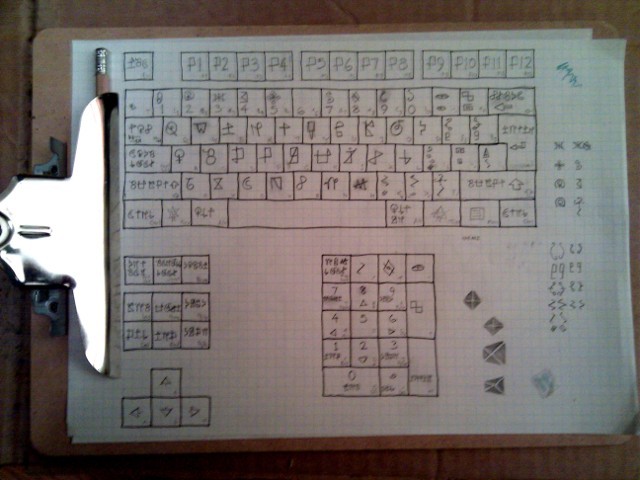
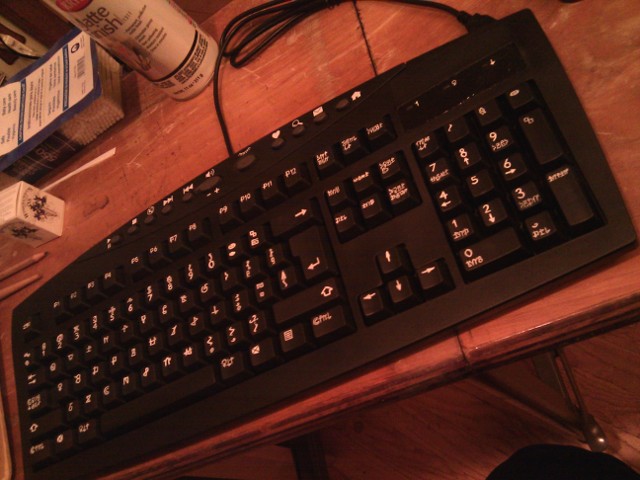
Making this chart also alerted me to the fact that there were no less than three symbols on the keyboard that I had yet to obtain — the ampersand, the caret and the tilde. At my next opportunity, I contrived a plausible reason for asking her about these. For the ampersand she immediately rendered the glyph. But to my dismay, for the other two she said she simply didn't know what they were, yet. I offered to help, explaining how the symbols were used in writing and in mathematics, and even pointing out that the caret was almost a triangle, but none of this had any effect. When I then suggested, "Maybe their caret and tilde looks just like ours?" she merely shrugged and replied, "Sure, for now." Hmmm.
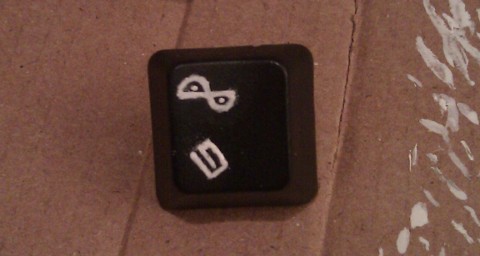
(In this photo you can also see some of the designs I played around with to replace the MS Windows-logo key, so as to make it more triangular.)
Along with the keyboard, I purchased a set of transparent keycap stickers. I thought this might be an easy way to add symbols to a blank keyboard. Even better if I could draw on the underside — the sticky side — and then the symbols wouldn't be at risk of wearing off from use.
However, my experiments with the stickers were dismal. Ink didn't adhere to the plastic material at all, on either side. I quickly gave up on that approach. In addition, I found that there was a very limited selection of pens that could draw in opaque white, using either gel ink or actual paint. (I guess traditionally speaking there's no such thing as white ink.)
Deciding that I needed help from someone with more experience, I dropped in at my neighborhood's maker space. The news there, however, was discouraging. While they could name a few different ways to make your own keyboard keys, they were all meant for mass production, and they would cost ridiculous amounts of money. (Like, thousands of dollars per keycap ridiculous.) They also confirmed my suspicion that keyboard stickers would peel off sooner rather than later.
Realizing that I maybe was taking the wrong approach to this, I walked over to the nearest art supply store instead, and asked the staff there what to do. Their recommendation? White enamel paint, due to its opacity even when applied in a thin coat. And bonus point: enamel paint cleans off easily with paint thinner, so I would be able to erase mistakes.
Along with paint and thinner, I purchased the smallest paintbrushes I could find in the store — a pair of 000 brushes made by two different companies.

Back home, I tried painting a couple of keys.
Small as the brushes were, they still produced a thicker line than what you normally find on a keyboard key. But it was thin enough to produce clean, legible symbols in the confined space of a keycap. Overall they looked good, and certainly far better than what any of my original ideas would have produced.
So, I got down to work.
As with any modern keyboard, the keys can be pried off easily, by gently using any straight, thin piece of metal. Even though it certainly didn't matter, I was religiously careful about keeping the keys in order, and not letting them get switched around before painting them.
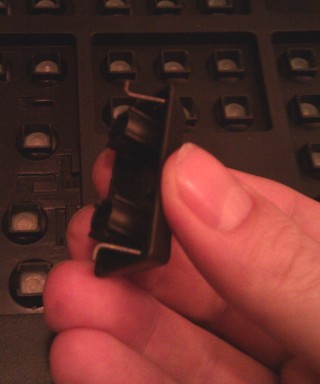
Many of the larger keys have a wire structure on the underside, which keeps them level when they're being pressed. The ends fit into slots in the bed of the keyboard, but otherwise they are inserted and removed just like the other keys.
For my initial painting session, I rendered all the keys that contained a single symbol.
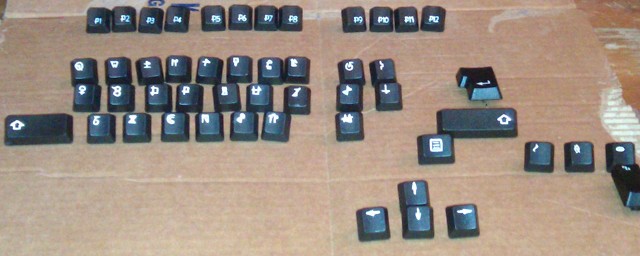
Along with the 26 letters of the Triangle alphabet, this covered the arrow keys, shift keys, the enter key, and a handful of keys on the numeric keypad. I would start by first drawing the glyphs on all the keys with a soft-lead pencil, making sure everything fit into the upper-left quadrant of the keycap. The pencil marks were difficult to see against the black plastic, but that also meant that I didn't need to erase them before painting over them.
I quickly discovered a few things in the process. The line thickness would vary unpleasantly when I changed the direction of my brush stroke — in order to keep it even I had to stick to a downward stroke as much as possible. Curved lines thus had to painted in several steps, rotating the key in my fingers in between strokes. I also found that it was easy to accidentally get way too much paint on the brush when dipping it, which would result in a too-thick line (both in width and in depth), so it was necessary to always paint on the scratch paper first to verify the thickness before touching paint to keycap.
Note that I also painted the twelve function keys, but I unthinkingly located the glyph in the lower-right quadrant instead of the upper-left. Later on, I went back and erased and repainted all of them.
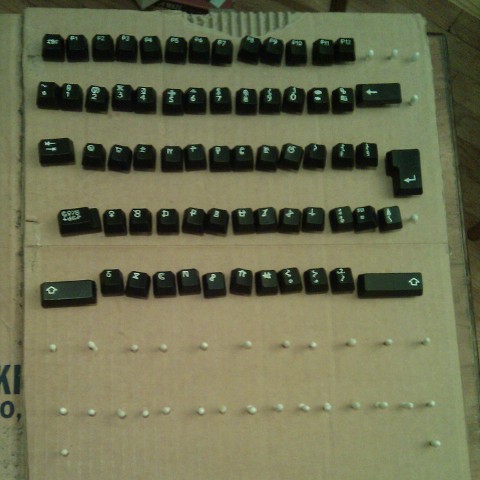
With fifty keys painted, I felt some degree of growing confidence, and so began the next set — the keys with two glyphs stacked vertically.
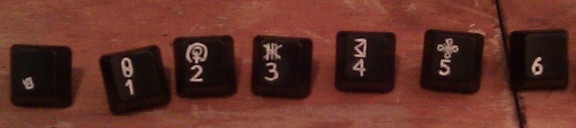
This set included the number keys, punctuation keys, and a few more from the numeric keypad. Some symbols were more difficult than others to fit into that tiny space. I'm looking at you, Triangle percent sign. You're pretty to look at, but you're a nightmare to render on half of a keycap.
(This photo also shows the still-gaping absences where the caret and tilde symbols are supposed to be.)
The keys that were the hardest to do were the ones that contained entire words. Some of these keys are wider than normal, such as Ctrl, Alt, and CapsLock. But many of them are standard sized, and I still had no idea how I was going to paint those. One person suggested painting with a toothpick — apparently this is a common technique for painting tiny details on D&D miniatures. To my surprise this produced a line that was no thinner than I got with my 000 brush.
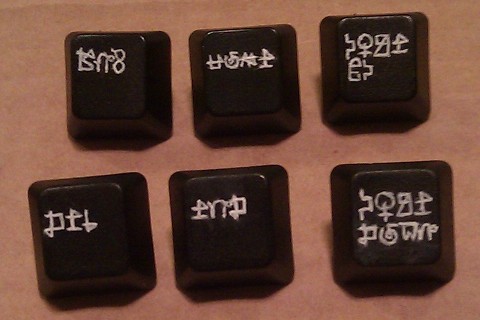
In the end I just barely managed to get a thin enough line using the same paintbrush I had been using with the other keys. How? By painting very, very carefully. I thoroughly cleaned the brush with paint thinner immediately beforehand, which temporarily slowed the congealing of the paint on the brush. I touched the keycap with the paintbrush as lightly as I could manage, avoiding any downward force that could cause the bristles to spread out. And the toothpick turned out to be useful after all: I discovered that I could use it, before the paint had dried, to scrape away paint with more precision than I could get using the paint thinner. I used the toothpick to scrape away mistakes, and also as a way to make lines thinner by removing paint along one edge. Once or twice I even used it to nudge the paint into its desired position before it finished drying.
Meanwhile, I continued to pester my daughter to determine what the caret and tilde glyphs looked like. Initially I was careful to ask offhandedly, fearful of raising her suspicions, but as December wore on I began making outright demands. When she continued to profess ignorance, I started offering exchanges of favors in return for these symbols. This worked to get the caret, but the tidle remained elusive.
Finally, six days before Christmas, she received a bit of inspiration, in exchange for help with dinner, and produced for me the Triangle's tilde (complete with some evolutionary backstory). My relief was palpable, and I painted the last keycap that evening.
The next step was to apply some kind of protective finish to the keys, since otherwise the paint would quickly erode from everyday usage. I had heard that people sometimes used clear nail polish for such things, with much success, but I wanted something that would leave a thinner coating. Also, nail polish tends to be smooth and glossy, and the tops of keyboard keys need to have a certain amount of friction to minimize typos caused by slippage.
The staff at the art supply store recommended a spray-on clear-coat finish. There was both a glossy version and a matte version available, so the latter seemed ideal. They warned me that I would want to apply three successive coats for it to stand up to the wear and tear of typing.
Since I had never used this stuff before, I did some research online. I quickly learned that for good results, I wanted to apply the finish someplace that was well-ventilated, warm, and dry. Finding a place having all three of those features simultaneously in Seattle — in December — posed a very real problem. But they were all necessary. If the place was poorly-ventilated, the fumes could be dangerous. If the place was cold, the coating wouldn't cure properly, or would take too long. And if it wasn't dry — well, I found horror stories of the finish taking on a foggy opaqueness, and that would ruin all of my hard work.
Lucky for me, a friend came through: His apartment building had a basement room set aside for just this kind of project work. The room was well-ventilated and dry, and came with some space heaters to provide the otherwise missing warmth. Another friend instructed me that a box turned on its side, with the opening facing the space heater at a distance of a few feet, would create a warm place inside which the finish would cure in a few minutes, despite the cold environment.
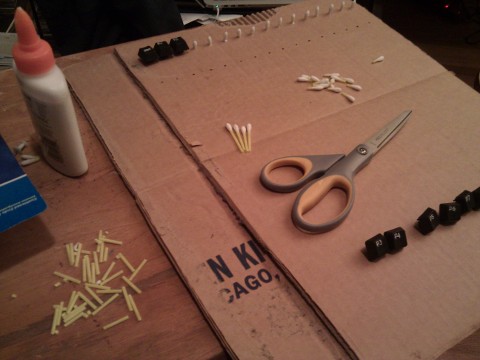
In order to ensure that the keys remained in place and facing upright while they were being sprayed and moved in and out of the box, I stuck the ends of a bunch of Q-tips into a piece of cardboard.
This may have been more trouble than it was really worth. The keys on this keyboard had large square posts on the underside, much larger in diameter than the Q-tips, so they didn't fit snugly. I cut a couple of them too long, which allowed those keys to list to one side or the other. I suspect that I would have been fine just laying the keys out in rows and being careful when moving them.
The matte finish worked perfectly, better than I had hoped. It was completely invisible when it dried, and it perfectly preserved the texture of the original keycaps. The only mistake I made was on the first pass. I initially missed a corner of one of the shift keys. When I gave it a brief extra spritz to cover the exposed area, I held the can too close to the key (about 6 inches, instead of the recommended 9-12), and that part of the key developed some dim, gray circular marks. Fortunately the effect was subtle, and didn't extend to the painted part of the key.
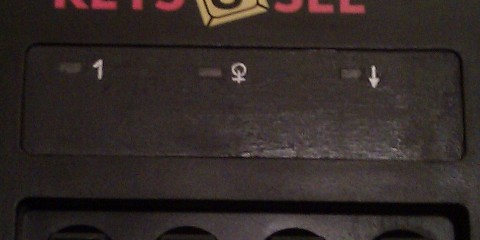
I also had to do a bit of painting on the body of the keyboard, to remove the keyboard's logo and the text labelling the LEDs. I cut out three small rectangles of tape to cover and protect the lights, then painted the entire section black. Once the paint had thoroughly dried, I removed the tape and painted three new labels.
I could have clear-coated this painted part of the keyboard as well, and in fact I should have. But that would have required me to put protection on the neighboring areas of the keyboard, particularly the interior of the keyboard bed, and I wasn't organized to have that ready in time. So instead, I just applied some clear nail polish to protect that part of the keyboard.

Unfortunately, the polish did not dry evenly over such a large area, and wound up forming a rough, lumpy coating. The spray-on finish would have looked much better. A minor flaw.
It wasn't until later that I discovered the keyboard's biggest flaw.
When I finally started putting the keys back onto the keyboard, I found that I had actually managed to paint the backspace key upside-down. Had I noticed before applying the finish, I could have repainted it, but at this point it was much too late. It was a very embarrassing mistake — but, if I had to accidentally paint one key upside-down, I couldn't have chosen a better one. Almost nobody noticed the error without my pointing it out, which certainly wouldn't have been true if it had been, say, one of the Alt keys.
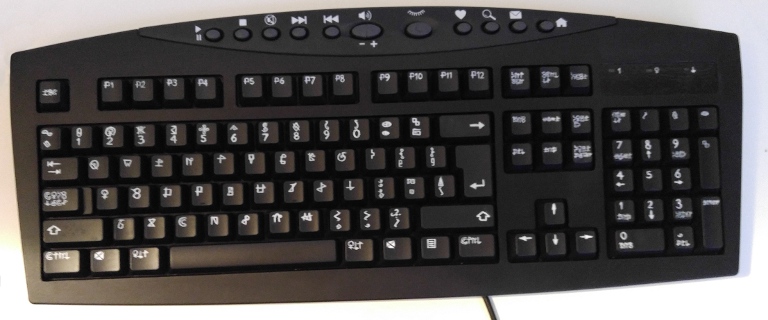
At last, the finished product.
Of course, when you've put this much effort into an unusual gift, it simply demands an unusual presentation. It's not enough to just gift-wrap it and stick it under the tree. The idea I had was to make it look like it had been delivered through the mail, presumably from the world of the Triangles.
I initially wrote the mailing address in Triangle, and then printed out the address in a normal font and taped it onto the package, covered with a small square of plastic wrap to make it look like the second address had been attached by the post office.
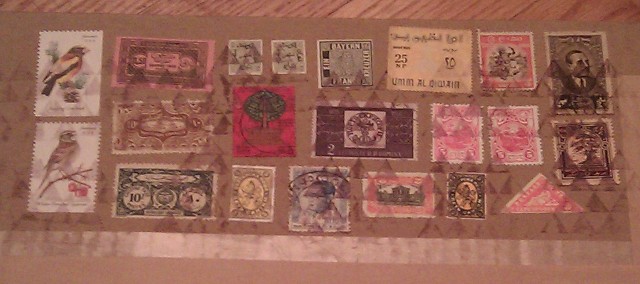
Next, I went out and bought a random selection of foreign stamps from a philately store. At a craft store specializing in rubber stamps, I purchased a stamp that was a pattern of triangles, along with a purple ink pad. The odd collection of stamps with a triangle-themed cancellation made the perfect touch.
I had an opportunity to leave the package by the apartment mailboxes on Christmas Eve when nobody was around, allowing the others to find it and bring it inside. A very mysterious package indeed. (In theory anyway. In reality, she knew full well that I was the only person beside herself who was fluent enough in Triangle to make that address.)
She opened the package first thing on Christmas morning, and found herself the happy owner of a uniquely personal keyboard.
… Of course, now she wants a font to go with it.